<-- Back to Part 0: Information
--> Go to Part 2: History
Restoration Project (3)
Last revision of this page: January 25, 2025
- Project (1): 005-293 - (5/19/2023)
- Project (2): 001-XYZ - (12/5/2023), PSRB-A
- Project (3): 004-670 - (3/27/2024)
Purchase
IMSAI (004-670)
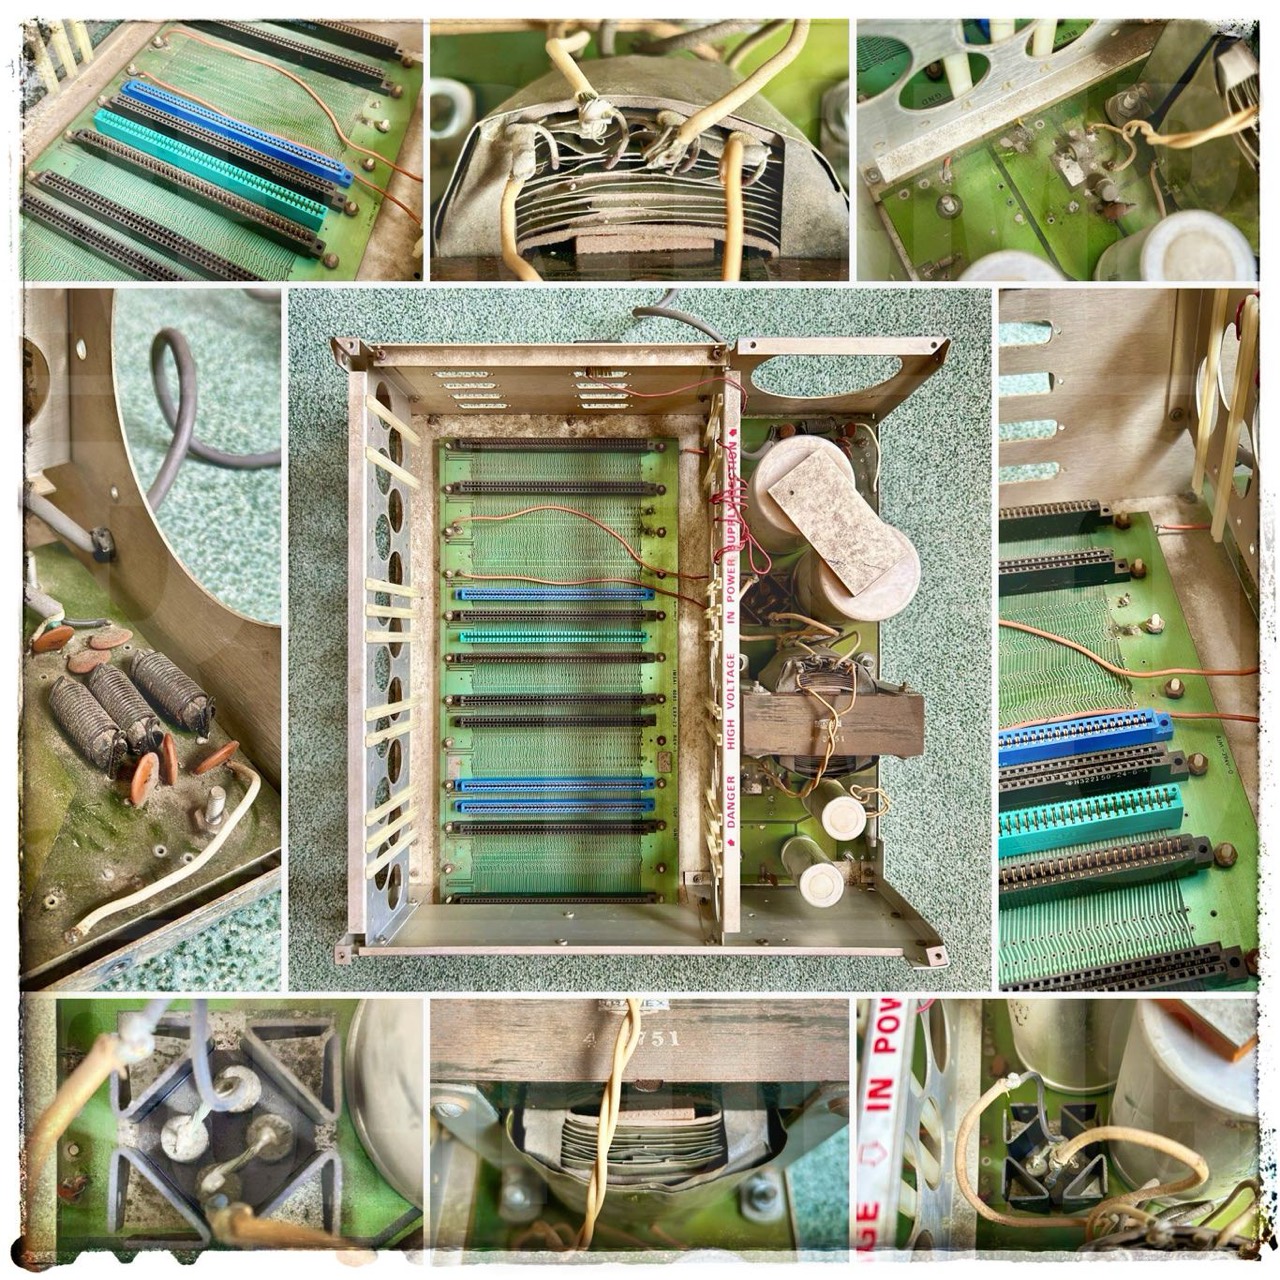
Dirt, defective and more dirt. This IMSAI is probably a "barn find". The cover is really dirty. There is a lot of dust and dirt inside. The front panel is defective and cannibalized, the mainboard is incomplete and the power supply also needs a complete overhaul. All in all, a real challenge; simply great.
Today (3/28/2024) I took the IMSAI completely apart, absolutely everything. After looking at the power supply and in particular the soldered connections of the AC cables, I almost come to the conclusion that this IMSAI has never worked before. I have never seen anything so bungling.
The purchase description states: "What is left of an original IMSAI 8080 Microcomputer. I have been selling off a collection of early Microcomputers that I rescued in the early 1990’s and this chassis is the last of the IMSAI 8080’s. The person I bought it from, stripped off anything he could use, and this is what is left."
But, ... I'm already looking forward to the moment when this IMSAI is brought back to life. That shouldn't be a problem. Only the front panel will be a bit of a challenge.
Case Top
I'm really looking forward to the restoration. In the next image, center right you can see the 1st cleaning success wonderfully.

So, the housing is now clinically clean, but you can see that it has suffered a little over the last 40 to 50 years. There are various stains and a few scratches directly on the metal. What to do? Leave it as it is or give it a new powder coating? I don't know yet. First of all, I'll get a quote. Maybe then the question will no longer arise.
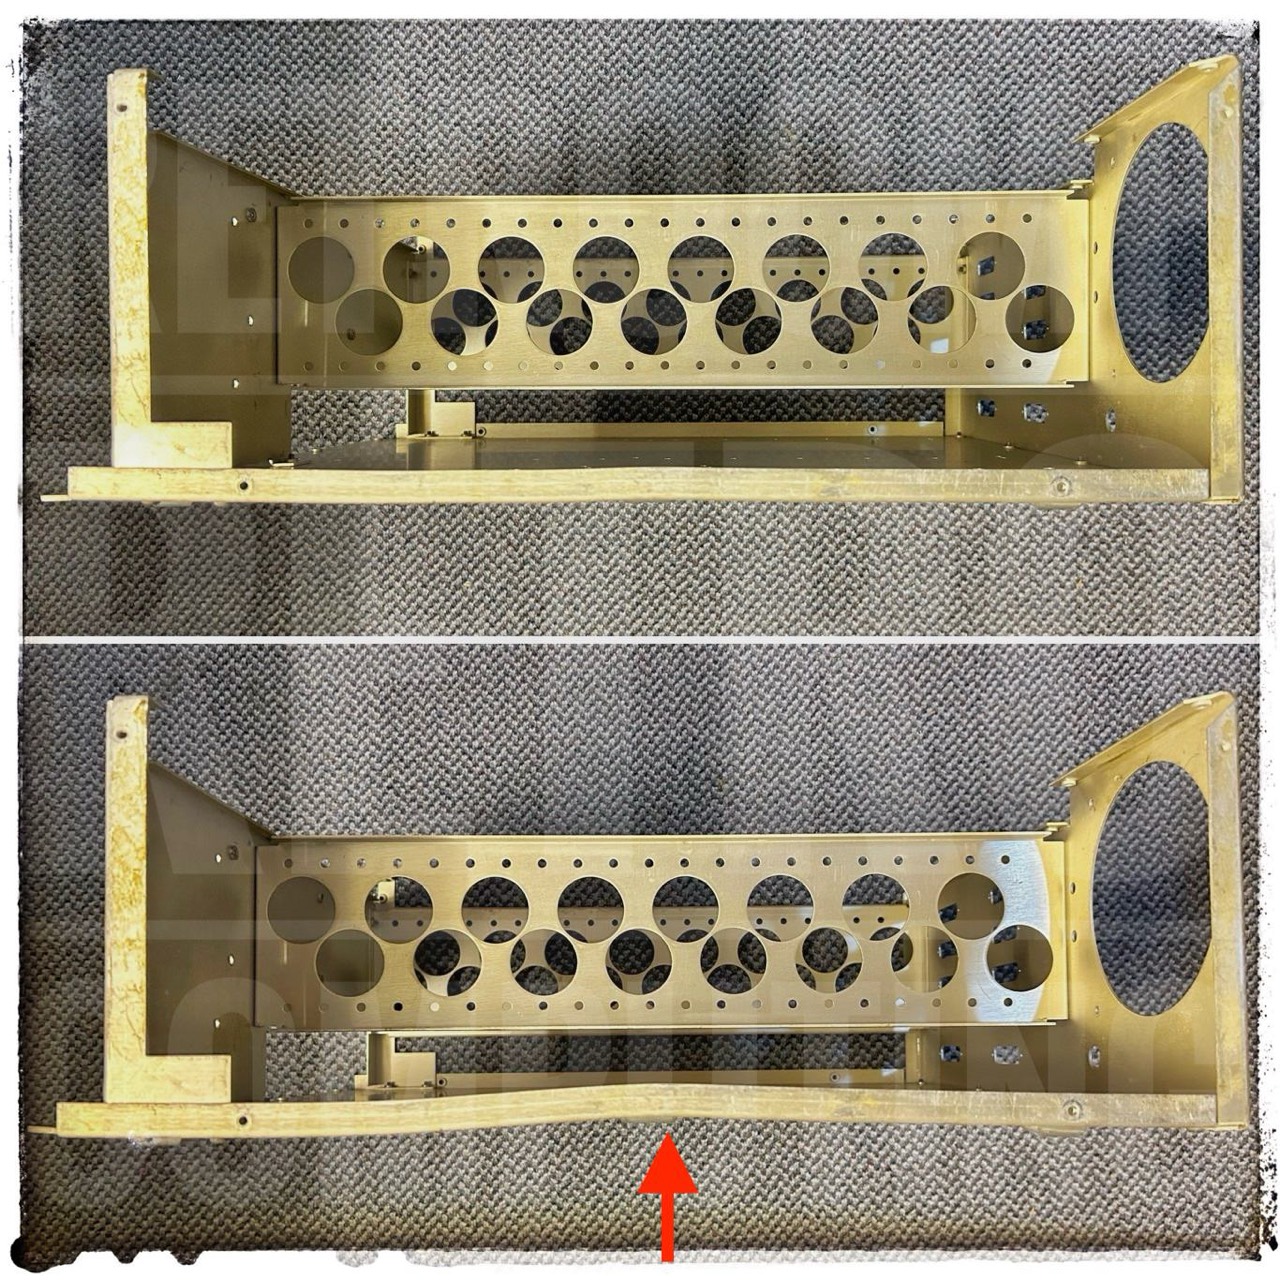
Base, Case and Inside
Dirt on every nook and cranny.
The IMSAI must have fallen down once. There was a real dent in the area of the (heavy) transformer. With a good vice and a little force, the dent is almost gone. And the case is now really nice and clean again.
Power Supply Unit

The power supply unit is the heart of every computer. You need to pay particular attention to this during restoration. Two components are important. The transformer power supply and the capacitors.
Capacitors
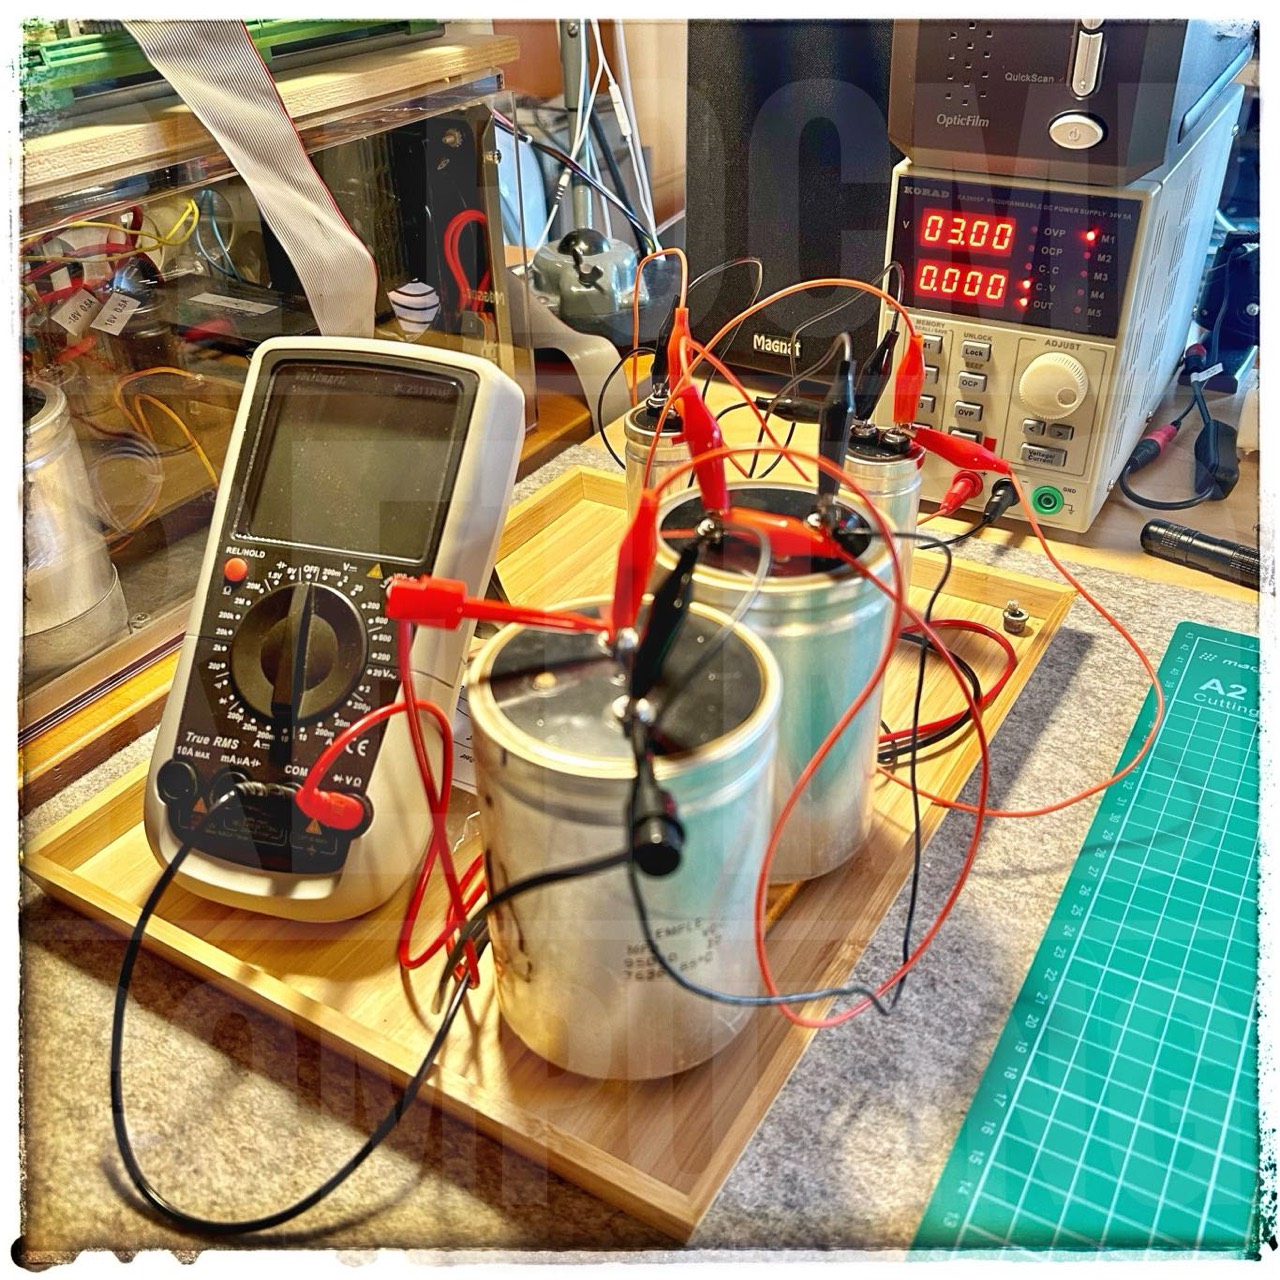
Before you switch on an old computer like this IMSAI for the first time, you need to reform the capacitors. This is a must, not a maybe. If you have a lab power supply, this is actually very easy, but it will still take several days (with interruptions, of course). I have written a lot about this topic on this page; read it first! I did not use a lab power supply there. Below is the very simple procedure with a lab power supply.
- Test the ESR first. If this is not OK, then you should dispose of the capacitor and not use it.
- Connect the capacitor(s) correctly to the laboratory power supply. Set the voltage to 1-2 V and limit the current to 2 mA. Activate the power supply unit. You should start with 2 mA. However, I never increase the current higher than the so-called leakage current. You can get this from the technical data sheet; it is usually between 5 and 10 mA.
- You will see that the power supply unit first switches to C.C. (constant current) and the voltage slowly approaches the Volt mark set. Then it switches to C.V. (contant voltage) and the amperage display (slowly) goes down to zero. What does this mean? The capacitor now has reformed for exactly this voltage and current. Now you only have to approach the target voltage in very small steps. You should stop at 2/3 of the rated voltage of the capacitor.
I started reforming the capacitors today (3/29/2024) and can confirm that they are behaving perfectly. I think they will be in top condition again after a week at the latest.
Update 3/30/2024: Day 3 of reforming. Meanwhile I have increased the voltage to 8V and 4 µA; everything is fine.
The following measurement result (voltage drop) is not representative because I average and measure the total voltage across all four capacitors. But a first overview. The lower or slower the voltage drop, the lower the loss due to the leakage current.
- 1 min: 7.87 V
- 3 min: 7.69 V
- 5 min: 7.55 V
- 9 min: 7.33 V
The voltage only drops below 7 V after 17 minutes. I would say everything is fine.
Update 3/31/2024: Day 4 of reforming. The voltate drops overnight (8 hrs) from 10 V to 3,75 V; very good. ... Tonight I charged the two 25V capacitors with the nominal voltage of 25V at a maximum current of 10 mA. Everything is fine.
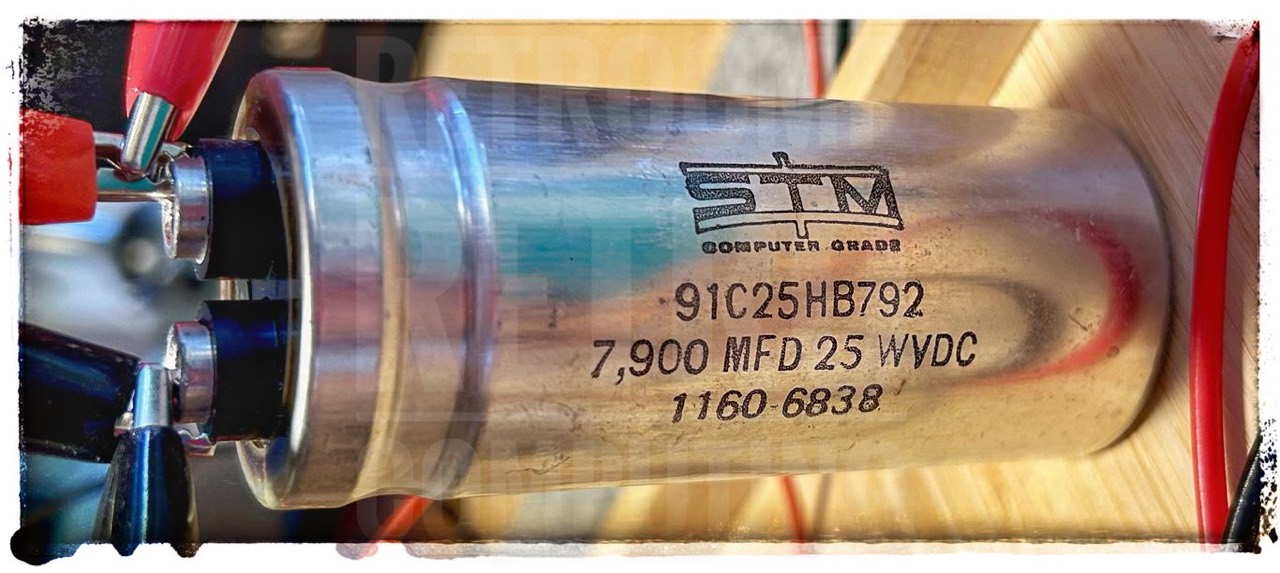
This IMSAI uses two large Temple (7636) 15 V with 95000 MFD and two small STM (6838) 25 V with 7,900 MFD. Yes, you read correctly, the two small ones were manufactured in the 38th calendar week of 1968!
PSU PCB
At the beginning I was still thinking about it, but then I removed every component. It took two hours with the final cleaning. I've never seen such a botched job. I almost think he used the soldering tin for a metal gutter and the corresponding soldering iron. The first owner had no idea what he was doing. Horrible! I wouldn't have been surprised if he had used a welding machine.
In the picture at the top right you can see a short in the 115V line. At the top left you can see the white cable for bridging the short.
I will replace everything but the three Radio frequency interference suppression chokes and the capacitors.


Transformer
See here.
Downloads
Here you will find all my gathered downloads for the IMSAI.
Information
- Here you will find all my gathered downloads for the IMSAI.
- You must read this blog: Ross Milbourne - Restoring an IMSAI 8080 for "The Centre For Computing History at Cambridge", UK, 2020
References
- (↑) ebay sales pictures
- (↑) https://www.elektormagazine.de/magazine/elektor-138/56976
My Series About the IMSAI 8080
--> Go to Part 0: Information
--> Go to Part 1 : Restoration (1) - Restoration (2) - Restoration (3)
--> Go to Part 2 : History
--> Go to Part 3 : Front Panel
--> Go to Part 4 : Emulator
--> Go to Part 5 : PSU
--> Go to Part 6 : The High Nibble
--> Go to Part 6 : RAM (of my North Star series)
--> Go to Part 7 : S-100 (of my North Star series)
--> Go to Part 8 : Capacitors (of my North Star series)